 Connect
 Events
 Business
 Organizations
 Entertainment and Media
 API
API Tools
Tools Learning Center
 Support
 Support Articles
Video Analytics
Assess Your Video’s Performance by Monitoring Viewer Behavior
Derive insights from Dacast’s advanced video analytics platform to analyze the performance and audience engagement of your live and on-demand video content.
No credit card required. By clicking Start Free Trial you agree to ourterms and conditions.
Advanced Dashboard and User Interface
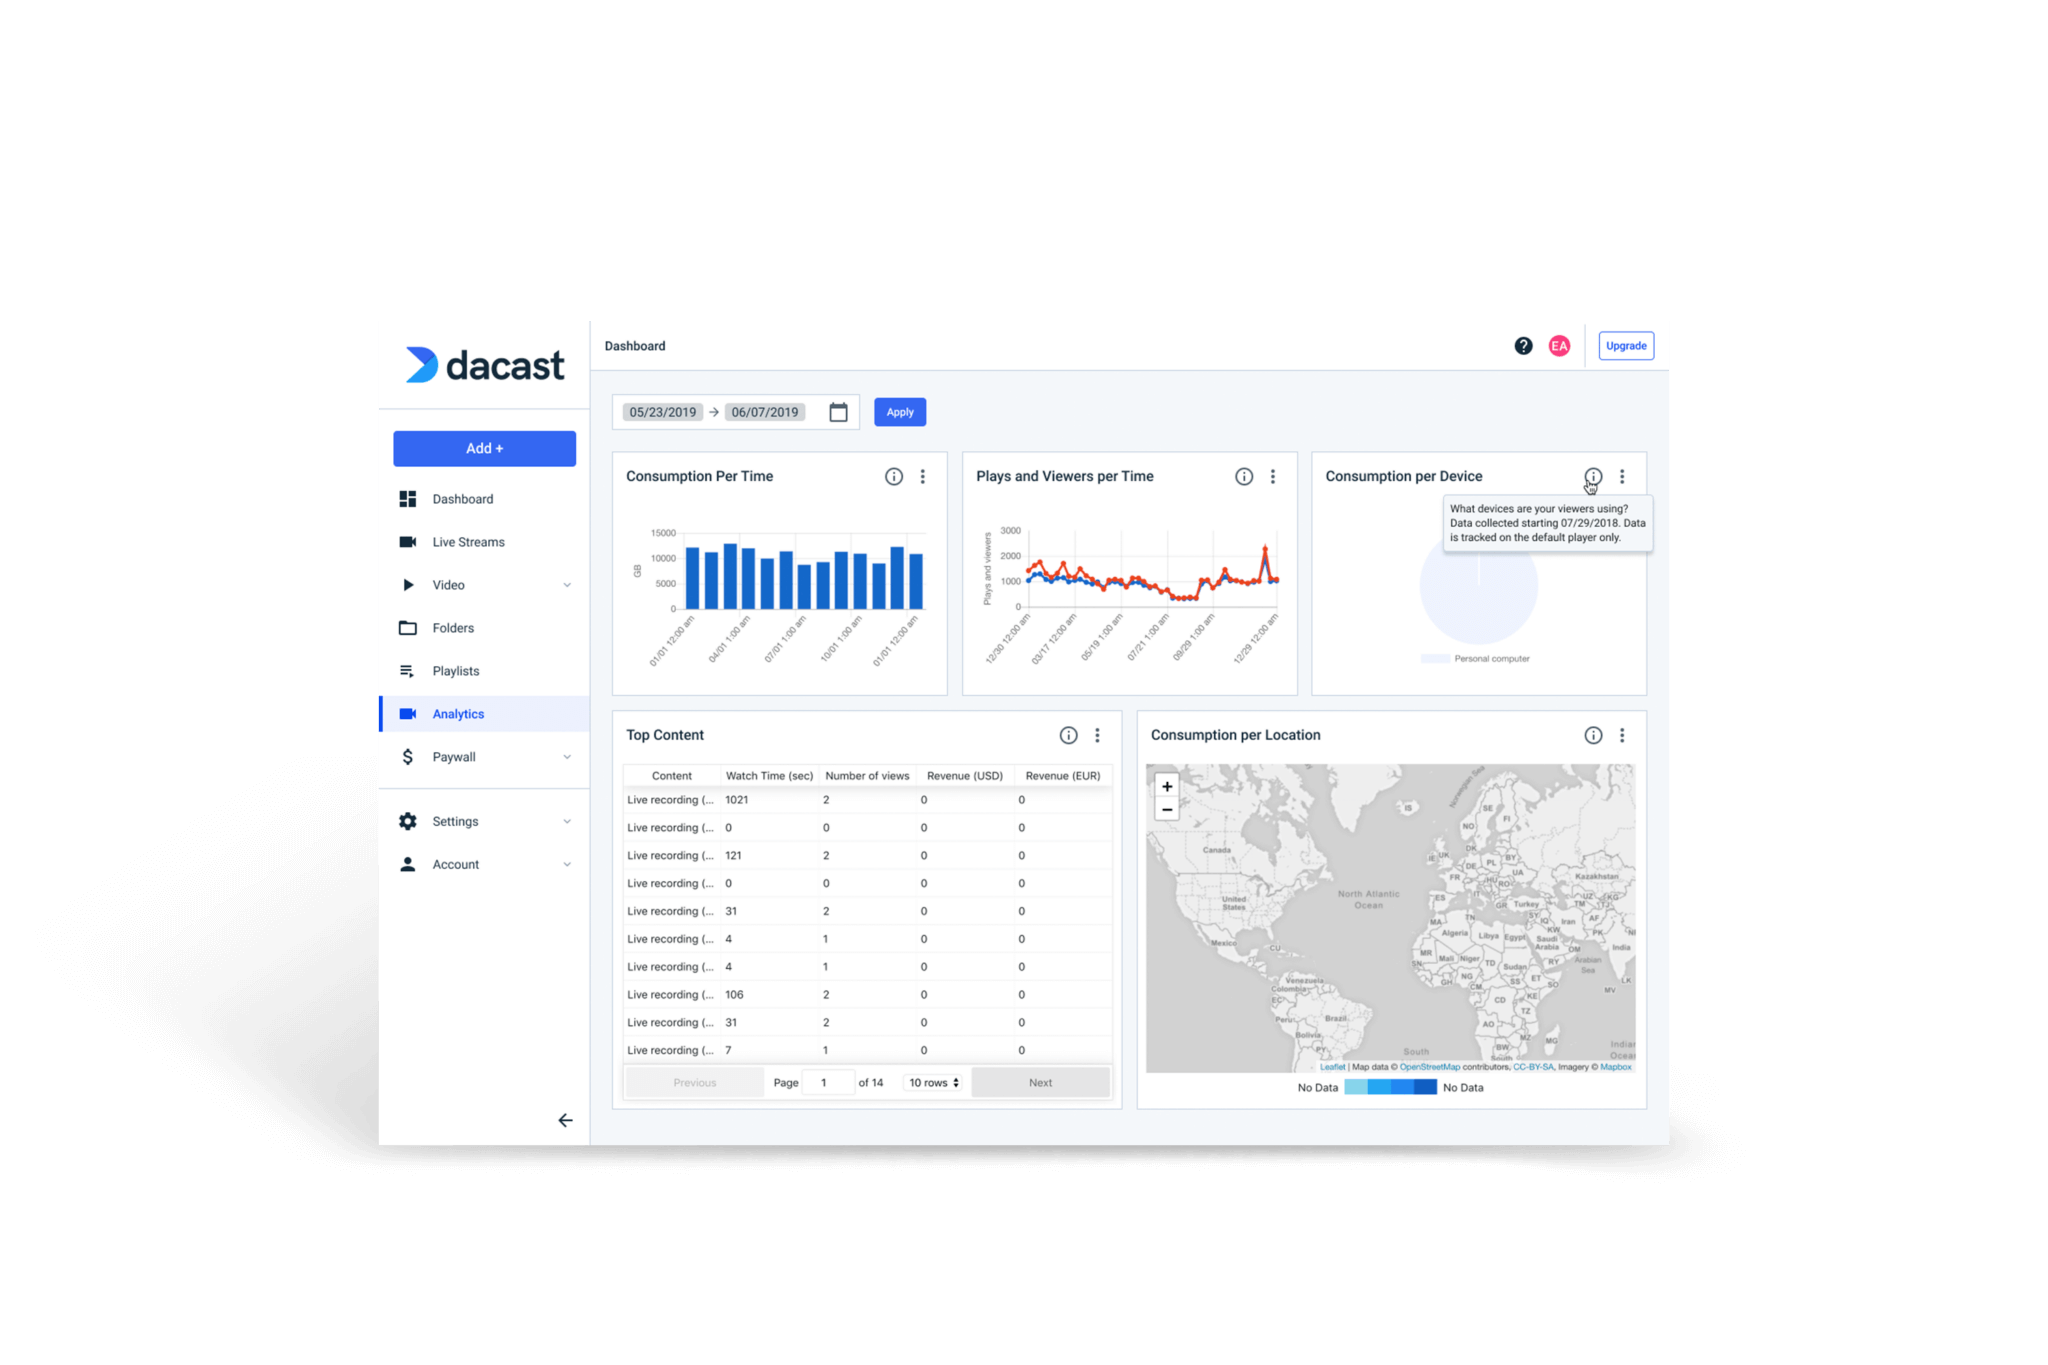
Navigate the Dashboard with Ease.
Access useful information about your audience’s behavior, including consumption time, plays and viewers per time, consumption per device, top performing content, and consumption per location. Learn MoreReal-Time Reporting
Respond to Issues Faster.
Monitor activity on your live stream in real-time. See where your viewers are located how many people are on at a time. This feature is great if you are hosting a private live event and you want to track your company’s participation. Get Insights

Monetization with Integrated Paywall
Actionable Insights from Content Monetization.
Dacast’s integrated payment system will handle all transactions directly in the player for fast reporting, and provide insights into viewership and transactions. Explore PaywallRevenue Analytics
Assess generated income.
Track your video’s revenue from subscriptions and pay-per-view, and analyze reports that cover sales by time, revenue by time, and sales by country. Understand who you are serving your content to, and where they are located. Get Started

Audience Engagement & Viewership
Monitor viewers’ behavior.
Pay attention to audience engagement to see where your viewers tuned in and when they dropped off is important. It lets you know which parts of your stream most effectively engaged your audience. I'm InterestedLocation Metrics
Powerful Audience Statistics.
Pinpoint viewers’ locations down to the city. Understanding where your audience is located helps you to tailor your content so that it resonates with them. Get the Details
“The support that Dacast offers is particularly good compared to other streaming providers, making them a clear choice for my business.”
CEO at ComeSee TV
24/7 Technical Support
The reliable help you need, when you need it
Our customer service team is here 24/7 to help you make the most of your streaming solution. Plus access a comprehensive knowledge base and dynamic online community of professionals.
SupportMost Popular Features

Mobile Streaming
Stream live to phones
Our HTML5 video player ensures compatibility with modern devices and browsers. No configuration is required, whether on a smartphone or a smart TV.
Learn more
White-label Platform
Your logo, your brand
Customize our video player with your logo and colors to put your brand front and center. The look and feel of your content is completely up to you.
Show Me How
High-Definition
Broadcast in full HD quality
Deliver pristine, quality video with multi-bitrate technology in full HD 1080p resolution to ensure that every viewer has an optimal experience.
Stream in HD
Embed Videos
Share video content
Use embed codes to easily share a video or live stream on any web page. Or, share videos with others via social media.
Get Started
Video Transcoding
Deliver your video
Use our transcoding services to offer your viewers the video quality they need according to their devices.
Let's Go
Secure Video Upload
Handle your video library
Bulk upload your video and add the layer of security your want. Access more video uploading and security tools via our advanced video hosting platform.
Upload SecurelyBest Streaming Pricing
Feature-rich and cost-competitive
Dacast is the only video platform offering high-performance live streaming and video hosting features at the best prices on the market.
Check It Out